Make eyelash glue at home using natural ingredients like honey, sugar, and activated charcoal. This homemade alternative is a safer, cost-effective option for sensitive eyes.

Eyelash glue is an essential product for anyone who uses false eyelashes or eyelash extensions. While store-bought eyelash glues are widely available, making your own glue at home can be a fun, cost-effective, and potentially safer alternative. In this ultimate guide, we’ll explore the process of making eyelash glue at home, the ingredients you’ll need, and the best practices for ensuring a safe and effective adhesive.
Benefits of Homemade Eyelash Glue
Customization
By making your own eyelash glue, you can customize the formula to suit your preferences and any sensitivities you may have to certain ingredients.
Cost-Effectiveness
Creating your own eyelash glue can be more cost-effective in the long run, as the ingredients are often cheaper than purchasing pre-made glue repeatedly.
Control Over Ingredients
Making your own glue allows you to control the ingredients, potentially avoiding harmful chemicals and allergens present in some commercial glues.
Essential Ingredients for Homemade Eyelash Glue
Natural Adhesive Base
To create a strong bond between your false lashes or extensions and your natural lashes, you’ll need a natural adhesive base. Some options include:
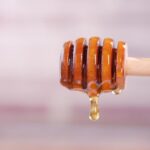
- Honey: A natural adhesive with antibacterial properties.
- Agar: A vegan alternative derived from seaweed with strong adhesive properties.
Glycerin
Glycerin helps maintain the glue’s consistency and makes it easier to apply.
Essential Oils
Adding essential oils to your homemade glue not only provides a pleasant scent but can also offer additional benefits, such as soothing the skin or promoting lash health. Some popular choices include:
- Lavender oil: Known for its calming properties.
- Tea tree oil: Recognized for its antimicrobial and anti-inflammatory effects.
Preservatives
To extend the shelf life of your homemade glue, you’ll need a preservative. Some natural options include:
- Vitamin E oil: An antioxidant that can help protect the glue from spoiling.
- Grapefruit seed extract: A natural preservative with antimicrobial properties.
How to Make Your Own Eyelash Glue: Step-by-Step Guide
Gather Your Ingredients and Tools
Before starting, make sure you have all your ingredients and tools on hand. You’ll need:
- A natural adhesive base (honey or agar)
- Glycerin
- Essential oil(s) of your choice
- A preservative (vitamin E oil or grapefruit seed extract)
- A small mixing bowl
- A sterilized container for storing the glue
- A spatula or spoon for mixing
Create the Adhesive Base
Start by mixing your natural adhesive base (honey or agar) with glycerin in a small mixing bowl. The ratio should be about 3 parts adhesive base to 1 part glycerin.
Add Essential Oils
Add a few drops of your chosen essential oil(s) to the mixture, being careful not to add too much, as essential oils can be potent.
Incorporate the Preservative
Mix in your chosen preservative (vitamin E oil or grapefruit seed extract) to ensure your homemade glue has a longer shelf life.
Combine and Test Consistency
Stir the mixture until all ingredients are well combined. The glue should have a smooth, thick consistency. If it’s too runny, add more adhesive base; if it’s too thick, add a small amount of glycerin.
Store Your Homemade Eyelash Glue
Transfer the glue into a sterilized container with an airtight lid. Store it in a cool, dry place, away from direct sunlight.
Test Your Homemade Glue for Allergies
Before applying your homemade eyelash glue to your eyes, it’s essential to conduct a patch test. Apply a small amount of the glue to the inside of your wrist or elbow and wait for 24 hours to see if any redness, itching, or irritation occurs. If you experience an adverse reaction, discontinue use and consider modifying the formula.
| Ingredient | Purpose |
|---|---|
| Honey | Adhesive and antibacterial properties |
| Sugar | Adhesive and helps maintain the glue’s consistency |
| Activated Charcoal | Provides color and absorbs toxins |
Tips for Using Homemade Eyelash Glue
Application Techniques
To apply your homemade eyelash glue, use a small brush or the edge of a toothpick to apply a thin layer of glue to the base of your false lashes or eyelash extensions. Allow the glue to become slightly tacky (approximately 30 seconds) before applying the lashes to your lash line.
Removal Process
When removing false lashes or extensions, avoid pulling or tugging, as this can damage your natural lashes. Instead, use a gentle makeup remover or oil (such as coconut or almond oil) to loosen the glue and gently slide the lashes off.
Shelf Life and Storage
Your homemade eyelash glue should last for several weeks if stored properly. Ensure the container is tightly sealed and store it in a cool, dry place away from direct sunlight. If the glue starts to change color, develops an unpleasant odor, or becomes too thick or runny, it’s time to discard it and make a fresh batch.
Conclusion
Making your own eyelash glue at home can be a rewarding and cost-effective way to customize your lash adhesive. By following this ultimate guide, you can create a safe, effective, and natural alternative to store-bought eyelash glues. Always patch test before use and follow proper application and removal techniques to maintain the health and beauty of your natural lashes.
Related posts:
 What is the Best Eyelash Glue? Everything You Must Know!
 How to Safely Remove Eyelash Glue from Your Eyes and Skin
 Is Eyelash Extension Glue Safe During Pregnancy? Must Read!
 How Long Does Eyelash Glue Last? Tips to Make it Last Longer
 How To Make Lip Oil At Home? (Step-by-Step)
 How to Make Lip Oil with Coconut Oil? Easy Way to Make It At Home
 How to Remove Ombre Powder Brows at Home?
 How to Get Rid of Brow Lamination at Home