To do ombre powder brows, obtain proper training and certification, gather necessary tools, prepare the client’s brows, follow a step-by-step procedure, ensure proper aftercare, and maintain safety and hygiene standards.
The Importance of Training and Certification for Ombre Powder Brows
Before attempting to perform ombre powder brows, it’s crucial to receive proper training and certification. This ensures you understand the techniques, risks, and safety measures involved in the process. Many institutions offer courses in permanent makeup, which include training in ombre powder brows. Obtaining a certification demonstrates your commitment to providing safe, high-quality services to your clients.
“Proper training and certification are essential for understanding the techniques, risks, and safety measures involved in ombre powder brows application.”
Table: Reasons for Training and Certification in Ombre Powder Brows
| Reason | Description |
|---|---|
| Techniques | Learn the correct methods for performing ombre powder brows |
| Safety | Understand the risks and proper safety measures |
| Client Trust | Certification builds trust with clients and demonstrates professionalism |
Training and certification are crucial for learning the correct techniques, ensuring safety, and building trust with clients.
Necessary Tools and Supplies for Ombre Powder Brows
To perform ombre powder brows, you’ll need several essential tools and supplies:
- Digital permanent makeup machine: This device is used to deposit pigment into the skin using a needle cartridge.
- Needle cartridges: Choose different needle sizes and configurations to achieve the desired ombre effect.
- Pigments: Select high-quality, hypoallergenic pigments that are designed for permanent makeup.
- Measuring tools: Use tools like calipers and brow stencils to achieve symmetrical and precise brow shapes.
- Disposable gloves: Wear gloves throughout the procedure to maintain hygiene.
- Numbing cream: Apply numbing cream to minimize client discomfort during the procedure.
- Aftercare products: Provide clients with aftercare products like healing ointments and instructions for post-procedure care.
“Essential tools and supplies for ombre powder brows include a digital permanent makeup machine, needle cartridges, pigments, measuring tools, disposable gloves, numbing cream, and aftercare products.”
Table: Necessary Tools and Supplies for Ombre Powder Brows
| Tool/Supply | Purpose |
|---|---|
| Digital permanent makeup machine | Deposit pigment into the skin |
| Needle cartridges | Achieve the desired ombre effect |
| Pigments | Ensure high-quality, hypoallergenic color |
| Measuring tools | Create symmetrical and precise brow shapes |
| Disposable gloves | Maintain hygiene |
| Numbing cream | Minimize client discomfort |
| Aftercare products | Support post-procedure healing |
To perform ombre powder brows, a range of tools and supplies are needed, including a digital permanent makeup machine, needle cartridges, pigments, measuring tools, disposable gloves, numbing cream, and aftercare products.
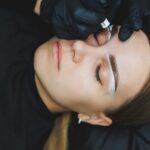
Preparing the Client’s Brows for the Ombre Powder Brows Process
Before beginning the ombre powder brows procedure, it’s essential to prepare the client’s brows. Proper preparation helps ensure optimal results and client satisfaction. Here are the steps to prepare the client’s brows:
- Consultation: Discuss the client’s desired brow shape, color, and overall expectations. Address any concerns and explain the procedure and aftercare process.
- Cleansing: Cleanse the client’s brow area with a gentle, antibacterial cleanser to remove any dirt, oil, or makeup.
- Numbing: Apply a numbing cream to the brow area to minimize discomfort during the procedure.
- Measuring and marking: Use measuring tools and brow stencils to outline the desired brow shape. Make any necessary adjustments according to the client’s preferences.
- Brow grooming: Remove any stray hairs outside the marked area using tweezers or waxing.
“Proper brow preparation, including consultation, cleansing, numbing, measuring, marking, and grooming, is essential for optimal results and client satisfaction.”
Table: Steps to Prepare Client’s Brows for Ombre Powder Brows
| Step | Description |
|---|---|
| Consultation | Discuss client’s desired brow shape, color, and expectations |
| Cleansing | Cleanse the brow area to remove dirt, oil, or makeup |
| Numbing | Apply numbing cream to minimize discomfort |
| Measuring and marking | Outline the desired brow shape |
| Brow grooming | Remove stray hairs outside the marked area |
Properly preparing the client’s brows ensures optimal results and satisfaction with the ombre powder brows procedure.
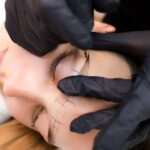
The Step-by-Step Ombre Powder Brows Procedure
After preparing the client’s brows, follow these steps to perform the ombre powder brows procedure:
- Pigment selection: Choose the appropriate pigment color based on the client’s natural hair color, skin tone, and preferences.
- Needle configuration: Select the appropriate needle size and configuration for the desired ombre effect.
- Pigment application: Begin applying the pigment using the digital permanent makeup machine. Start at the tail of the brow and work towards the front using small, circular motions. Gradually build up the color and intensity to create the ombre effect.
- Shading: To achieve a seamless blend, shade the front of the brow with a lighter pigment to create a soft, natural transition.
- Checking and adjusting: Periodically check the brows for symmetry and evenness. Make any necessary adjustments before the pigment sets.
- Wipe and assess: Gently wipe away any excess pigment and assess the final result. Touch up any areas that require additional pigment.
“The ombre powder brows procedure involves pigment selection, needle configuration, pigment application, shading, checking and adjusting, and wiping and assessing the final result.”
Table: Ombre Powder Brows Procedure Steps
| Step | Description |
|---|---|
| Pigment selection | Choose the appropriate pigment color |
| Needle configuration | Select the right needle size and configuration |
| Pigment application | Apply pigment using a digital permanent makeup machine |
| Shading | Blend colors for a seamless ombre effect |
| Checking and adjusting | Ensure symmetry and evenness |
| Wipe and assess | Remove excess pigment and assess the final result |
Following these steps will help you achieve professional, natural-looking ombre powder brows for your clients.
Tips for Achieving Natural-Looking Ombre Powder Brows
To create natural-looking ombre powder brows, keep these tips in mind:
- Choose the right pigment: Select a pigment color that complements the client’s natural hair color and skin tone. Avoid choosing colors that are too dark or too bold.
- Use proper needle depth: Ensure the needle penetrates the skin at the correct depth to avoid pigment migration or blurring.
- Create a smooth gradient: Gradually build up the pigment intensity from the front to the tail of the brow to create a seamless ombre effect.
- Apply light pressure: Use light pressure when applying pigment to avoid creating harsh lines or an unnatural appearance.
- Customize the brow shape: Tailor the brow shape to suit the client’s unique facial features and preferences.
“To achieve natural-looking ombre powder brows, focus on selecting the right pigment, using proper needle depth, creating a smooth gradient, applying light pressure, and customizing the brow shape.”
Table: Tips for Natural-Looking Ombre Powder Brows
| Tip | Description |
|---|---|
| Choose the right pigment | Complement client’s hair color and skin tone |
| Use proper needle depth | Prevent pigment migration or blurring |
| Create a smooth gradient | Achieve a seamless ombre effect |
| Apply light pressure | Avoid harsh lines or unnatural appearance |
| Customize brow shape | Suit client’s facial features and preferences |
Following these tips will help you create natural-looking ombre powder brows that enhance your client’s features.
Post-Procedure Care and Touch-Up Sessions
Proper aftercare is crucial for the longevity and appearance of ombre powder brows. Here are some post-procedure care guidelines and touch-up session information:
- Keep the area clean: Cleanse the brow area gently with a cotton pad and a mild, fragrance-free cleanser. Avoid using harsh chemicals or scrubbing the area.
- Avoid moisture: Keep the brow area dry for at least 7-10 days. Avoid swimming, saunas, and steam rooms.
- Avoid direct sunlight: Protect the brows from direct sunlight for at least 2 weeks. Sun exposure can cause pigment fading or color changes.
- Do not pick or scratch: Allow any scabbing or flaking to heal naturally. Picking or scratching can cause scarring or pigment loss.
- Touch-up sessions: Schedule a touch-up session 4-6 weeks after the initial procedure to address any areas that need additional pigment or adjustments.
“Proper post-procedure care, including keeping the area clean, avoiding moisture and direct sunlight, and not picking or scratching, is essential for the longevity and appearance of ombre powder brows.”
Table: Post-Procedure Care and Touch-Up Sessions
| Care Tips | Description |
|---|---|
| Keep area clean | Use a mild cleanser and cotton pad |
| Avoid moisture | Keep brows dry for 7-10 days |
| Avoid direct sunlight | Protect brows for at least 2 weeks |
| Do not pick or scratch | Allow scabbing and flaking to heal naturally |
| Touch-up sessions | Schedule 4-6 weeks after the initial procedure |
Following these aftercare guidelines will help ensure the best results for your client’s ombre powder brows.
Maintaining Safety and Hygiene During Ombre Powder Brows Application
Ensuring safety and hygiene throughout the ombre powder brows process is essential to protect both the client and the artist. Here are some key guidelines to follow:
- Wear protective gear: Artists should wear disposable gloves, masks, and, if necessary, protective eyewear to minimize the risk of contamination.
- Sterilize equipment: Use an autoclave to sterilize non-disposable tools, such as tweezers and scissors, between clients.
- Use single-use needles: Always use a new, sterile needle for each client to prevent cross-contamination and infection.
- Clean and disinfect surfaces: Regularly clean and disinfect all surfaces in the treatment area, including chairs, countertops, and trays.
- Follow local regulations: Adhere to local health and safety regulations regarding licensing, inspections, and sanitation practices.
“Maintaining safety and hygiene during ombre powder brows application involves wearing protective gear, sterilizing equipment, using single-use needles, cleaning surfaces, and following local regulations.”
Table: Safety and Hygiene Guidelines for Ombre Powder Brows
| Guideline | Description |
|---|---|
| Wear protective gear | Use disposable gloves, masks, and eyewear |
| Sterilize equipment | Autoclave non-disposable tools |
| Use single-use needles | Prevent cross-contamination and infection |
| Clean and disinfect surfaces | Maintain a clean treatment area |
| Follow local regulations | Adhere to health and safety requirements |
By implementing these safety and hygiene measures, you can provide a secure and comfortable environment for your clients during their ombre powder brows procedure.
Key Takeaways
- Ombre powder brows require proper training, certification, and the right tools and supplies.
- Prepare the client’s brows and follow a step-by-step procedure to achieve the desired results.
- Focus on creating a natural-looking ombre effect with customized brow shapes.
- Ensure proper post-procedure care and schedule touch-up sessions as needed.
- Maintain safety and hygiene standards throughout the process.
Conclusion
Learning how to do ombre powder brows involves understanding the importance of training and certification, gathering the necessary tools and supplies, following a step-by-step procedure, and maintaining safety and hygiene. By following these guidelines, you can offer your clients a professional and satisfying ombre powder brows experience.
Related posts:
 What Is Ombre Powder Brows? Everything You Need to Know
How Long Does Ombre Powder Brows Last? Aftercare Tips for Long Lasting Brow Tattoos
What Is Ombre Powder Brows? Everything You Need to Know
How Long Does Ombre Powder Brows Last? Aftercare Tips for Long Lasting Brow Tattoos
 Ombre vs Powder Brows
 How Much Do You Tip for Ombre Powder Brows?
 Pros and Cons of Ombre Powder Brows
 How to Lighten Ombre Powder Brows?
 How to Clean Ombre Powder Brows
 How to Take Care of Ombre Powder Brows