Brow lamination can be done at home with a quality kit and careful application. After cleansing and preparing your eyebrows, you apply lifting cream and setting lotion, and finish with a nourishing oil. Proper post-care, like avoiding water and makeup for 24 hours, will help preserve your results.
Gathering Your Brow Lamination Kit: What You Need
For at-home brow lamination, a quality brow lamination kit is essential. Most kits come equipped with the following:
- Cleanser: To ensure your brows are clean before starting the process.
- Lifting Cream: The first step in the lamination process, it softens the hair and prepares it for repositioning.
- Setting Lotion: Sets the brows in their new position.
- Nourishing Oil: Applied after the process to hydrate and condition the brow hairs.
In addition to the kit, you’ll also need cling film to cover your brows during the processing time, a clean spoolie to brush and shape your brows, and cotton buds for application.
“A quality brow lamination kit typically includes a cleanser, lifting cream, setting lotion, and nourishing oil, but remember to also have cling film, a clean spoolie, and cotton buds at hand.”
| Brow Lamination Kit Contents | Usage |
|---|---|
| Cleanser | To clean the brows |
| Lifting Cream | To soften the hair |
| Setting Lotion | To set the brows in the new position |
| Nourishing Oil | To hydrate and condition the brow hairs |
Preparing Your Eyebrows for Lamination
Preparation is key for successful brow lamination. Here are the necessary steps:
- Patch Test: This should be done 24 hours before the procedure to rule out any potential allergies to the products.
- Cleanse Your Brows: Make sure your brows are clean and free of makeup or oil.
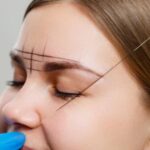
- Comb Your Brows: Comb your brows in the direction you want them to sit after the lamination.
Remember, the cleaner and more prepared your eyebrows are, the better the results will be.
“To prepare your eyebrows for lamination, perform a patch test, cleanse your brows, and comb them in the desired direction.”
Step-by-Step Guide to Performing Brow Lamination
Let’s delve into the step-by-step process of brow lamination:
- Step 1: Start with a patch test 24 hours before the procedure.
- Step 2: Cleanse your eyebrows.
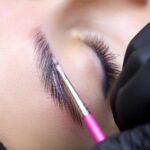
- Step 3: Apply the lifting cream to your brows using a cotton bud.
- Step 4: Comb your brows in the desired direction.
- Step 5: Cover your brows with cling film and leave it on for 10 minutes (or as instructed by your kit).
- Step 6: Remove the cling film and lifting cream with a damp cotton pad.
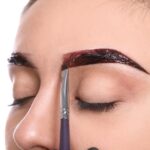
- Step 7: Apply the setting lotion and comb your brows again in the desired direction.
- Step 8: Cover your brows with cling film and leave it on for 10 minutes.
- Step 9: Remove the cling film and setting lotion with a damp cotton pad.
- Step 10: Apply nourishing oil to your brows.
“The process of brow lamination involves a series of steps from a patch test, cleansing, applying lifting cream and setting lotion, to finishing with nourishing oil.”
| Steps | Description |
|---|---|
| Step 1 | Patch test |
| Step 2 | Cleanse eyebrows |
| Step 3 & 4 | Apply lifting cream and comb brows |
| Step 5 & 6 | Cover with cling film, then remove cream |
| Step 7 & 8 | Apply setting lotion, cover with cling film, then remove |
Best Practices for Applying Brow Lamination Products
While performing brow lamination, consider these best practices:
- Be Gentle: The skin around your eyebrows can be sensitive, so apply the products gently to avoid irritation.
- Follow Directions: Ensure to strictly follow the instructions provided with your kit for best results.
- Avoid Overuse: Overuse of the products can potentially damage your eyebrows. It’s better to use less product initially and add more if needed.
- Work Quickly but Precisely: The products start working as soon as they’re applied, so work quickly but accurately to get the desired results.
“During brow lamination, be gentle, strictly follow instructions, avoid overuse of products, and work quickly but accurately for the best results.”
| Best Practices | Explanation |
|---|---|
| Be Gentle | Avoid irritating the sensitive skin around the eyebrows |
| Follow Directions | Adhere to the kit’s instructions for best results |
| Avoid Overuse | Too much product can potentially damage your eyebrows |
| Work Quickly but Precisely | The products start working immediately, so apply them accurately and swiftly |
Handling Challenges During Brow Lamination
Even with careful preparation and precise application, challenges might arise during brow lamination:
- Uneven Brow Hair Direction: This can be solved by combing the brows thoroughly in the desired direction before applying the lifting cream.
- Excess Product: Remove any excess product with a damp cotton pad before moving on to the next step.
- Irritation or Discomfort: If you feel any irritation or discomfort, it’s crucial to stop the process immediately and remove the products.
“To handle challenges during brow lamination, ensure your brows are combed properly, remove any excess product, and stop the process immediately if you feel irritation or discomfort.”
| Challenges | Solutions |
|---|---|
| Uneven Brow Hair Direction | Thoroughly comb the brows in the desired direction |
| Excess Product | Remove it with a damp cotton pad |
| Irritation or Discomfort | Stop the process and remove the products |
Post-Lamination Care: Preserving Your Results
Preserving the results of your brow lamination requires proper post-care:
- Avoid Water: For at least 24 hours after the treatment, avoid wetting your eyebrows.
- Condition Your Brows: Regularly condition your brows to keep them hydrated and healthy.
- Avoid Makeup: For at least 24 hours post-treatment, don’t apply any makeup to your eyebrows.
“Post-lamination care involves avoiding water and makeup for at least 24 hours and regularly conditioning your brows to preserve your results.”
| Post-Lamination Care | Explanation |
|---|---|
| Avoid Water | Don’t wet your eyebrows for at least 24 hours after treatment |
| Condition Your Brows | Regular conditioning keeps your eyebrows hydrated and healthy |
| Avoid Makeup | Don’t apply makeup to your eyebrows for at least 24 hours post-treatment |
Key Takeaways
Brow lamination is a popular beauty trend that provides a more groomed and fuller look for eyebrows. Performing brow lamination at home requires a quality kit, careful preparation, precise application, and a well-adhered to post-care routine. The key elements to remember are:
- Always perform a patch test 24 hours prior to the procedure.
- Follow the instructions of your brow lamination kit accurately.
- Handle any challenges that arise during the process with care.
- Post-lamination care is vital for preserving your results.
Conclusion
Performing brow lamination at home can be a simple process with the right knowledge and tools. Remember to follow the steps carefully and always prioritize the health of your brows. Regular conditioning and post-care will help maintain your results, allowing you to enjoy fuller, more groomed brows for longer!